
Item records
In Koha each bibliographic record can have one or more items attached. These items are sometimes referred to as holdings. Each item includes information to the physical copy the library has.
Adding itemsNote
Staff members must have the edit_items permission (or the superlibrarian permission) in order to be able to add items.
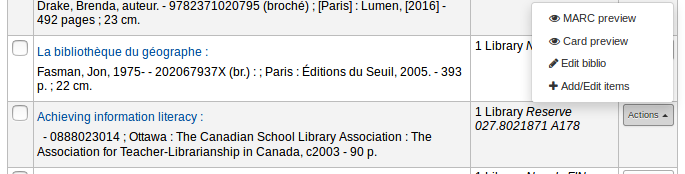
After saving a new bibliographic record, you will be redirected to a blank item record so that you can attach an item to the bibliographic record. You can also click ‘Add/Edit items’ from the cataloging search results
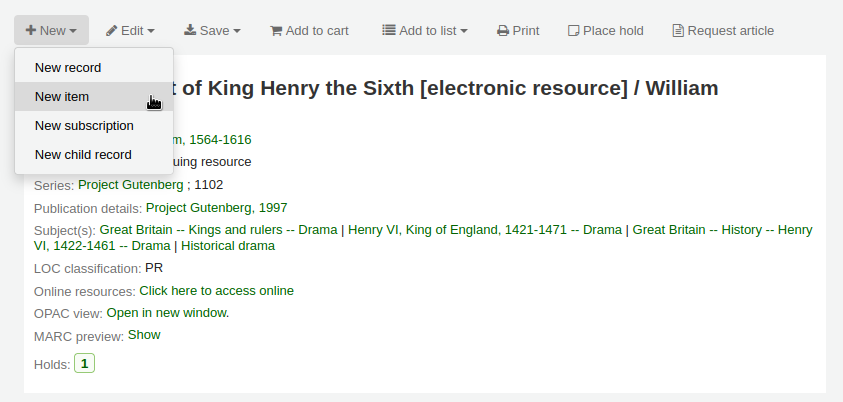
or you can add new item at any time by clicking ‘New’ on the bibliographic record and choosing ‘New item’
The item edit form will appear:

If you already have item templates, you can choose the template to apply and click ‘Apply template’. This will pre-fill the item form with the template values.
At the very least, if you plan on circulating the item, the following fields should be entered for new items:
2 - Source of classification or shelving scheme
If you’d like you can use the cataloging plugin ‘call number browser’ (cn_browser.pl) for this field. If it’s enabled you’ll see a … to the right of the field. When clicked that will open a call number browser window if the row is highlighted in Red then the call number is in use, if there is a thin Green line instead then the call number can be used.


This value will be charged to patrons when you mark an item they have checked out as ‘Lost’
To make sure that these values are filled in you can mark them as mandatory in the framework you’re using and then they will appear in red with a ‘required’ label. The item will not save until the required fields are filled in.

Note
To make item subfields required in a framework, edit the 952 field in the framework editor.
You can add a new authorized value directly from the add and edit item screen for any fields that are linked to authorized value categories such as Shelving location (subfield$c) or Collection code (subfield$8).
Start to type the authorized value description, if a match is not found you will see the option ‘(Select to create)’.
Click on this option to display a pop-up window where you can create you new authorized value.
The authorized value category will be pre-populated from the field you are using, for example LOC for Shelving location, CCODE for Collection code. Take care when choosing your authorized value code. Refer to the notes on adding new authorized values for the correct format of these codes. Use the Description field for the actual value that will be displayed

You can add authorized values in the same way from bibliographic and authority records.
Note
Only staff with the manage_auth_values permission (or the superlibrarian permission) will be able to add authorized values from cataloging.
Below the add form there are 3 buttons for adding the item.

‘Add item’ will add just the one item
‘Add & duplicate’ will add the item and fill in a new form with the same values for you to alter
‘Add multiple copies of this item’ will ask how many copies and will then add that number of items adding +1 to the barcode so each barcode is unique

‘Save as template’ will save this item as an item template to reuse later.
Warning
Saving as template will not save the item. It will only create the template.
Your added items will appear above the add form once submitted

Note
You can customize the columns of this table in the ‘Table settings’ section of the Administration module (table id: Items Editor).
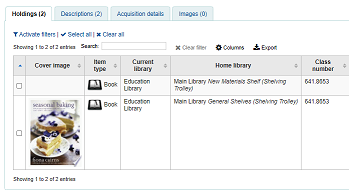
Your items will also appear below the bibliographic details on the record details page, in the ‘Holdings’ tab.

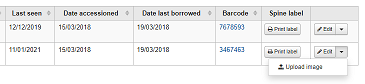
If the SpineLabelShowPrintOnBibDetails system preference is set to ‘Show’, there will be a button to print a quick spine label next to each item.

You can also filter the contents of your holdings table by clicking the ‘Activate filters’ links. This will show a row at the top where you can type in any column to filter the results in the table.
You can create item templates to share and reuse in order to easily fill out the new item form.
Note
Anyone who has the edit_items permission can create and share item templates, and delete their own templates.
However, staff members must have the manage_item_editor_templates permission (or the superlibrarian permission) in order to manage item templates created by others.
To create an item template,
Go to add a new item
Fill out the item form with the values you want to add to the template
Instead of saving the item, click the ‘Save as template’ button

Choose ‘Save as new template’
Enter a template name
Choose if you want this template to be shared with all other catalogers
Click ‘Save’
Updating an existing templateTo edit an existing template,
Go to add a new item
Choose the template to update at the top of the form

Click ‘Apply template’
Change the values as needed
Click the ‘Save as template’ button.
Choose the template to update
Choose if you want this template to be shared with all other catalogers
Click ‘Save’
Using a templateTo use a template,
Go to add a new item
Choose the template to update at the top of the form
Click ‘Apply template’
If checking ‘For session’, all new items will be based on this template, unless otherwise specified
Change the values as needed
Save the item
Deleting a templateTo delete a template,
Go to add a new item
Choose the template to delete at the top of the form
Click ‘Delete template’
Editing itemsNote
Staff members must have the edit_items permission (or the superlibrarian permission) in order to be able to edit items.
Items can be edited in several ways.
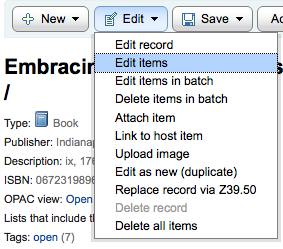
Clicking ‘Edit’ and ‘Edit items’ from the bibliographic record
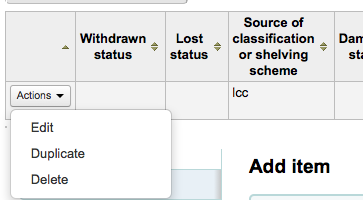
Which will open up a list of items where you can click the ‘Actions’ button to the left of the specific item you would like to edit and choose ‘Edit’.
Clicking ‘Edit items’ beside the item on the ‘Items’ tab
Which will open up the editor on the item you’d like to edit
Clicking ‘Edit’ and then ‘Edit items in batch’

This will open up the batch item modification tool where you can edit all of the items on this record as a batch.
You can also enable StaffDetailItemSelection to have checkboxes appear to the left of each item on the detail display. You can then check off the items you would like to edit and click ‘Modify selected items’ at the top of the list.
You can click ‘Edit’ to the right of each item in the Holdings tab
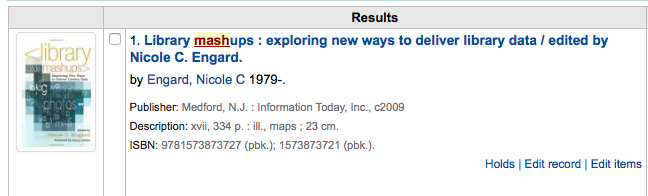
There is also a link to Edit items from the search results in the staff client
Finally you can use the batch item modification tool
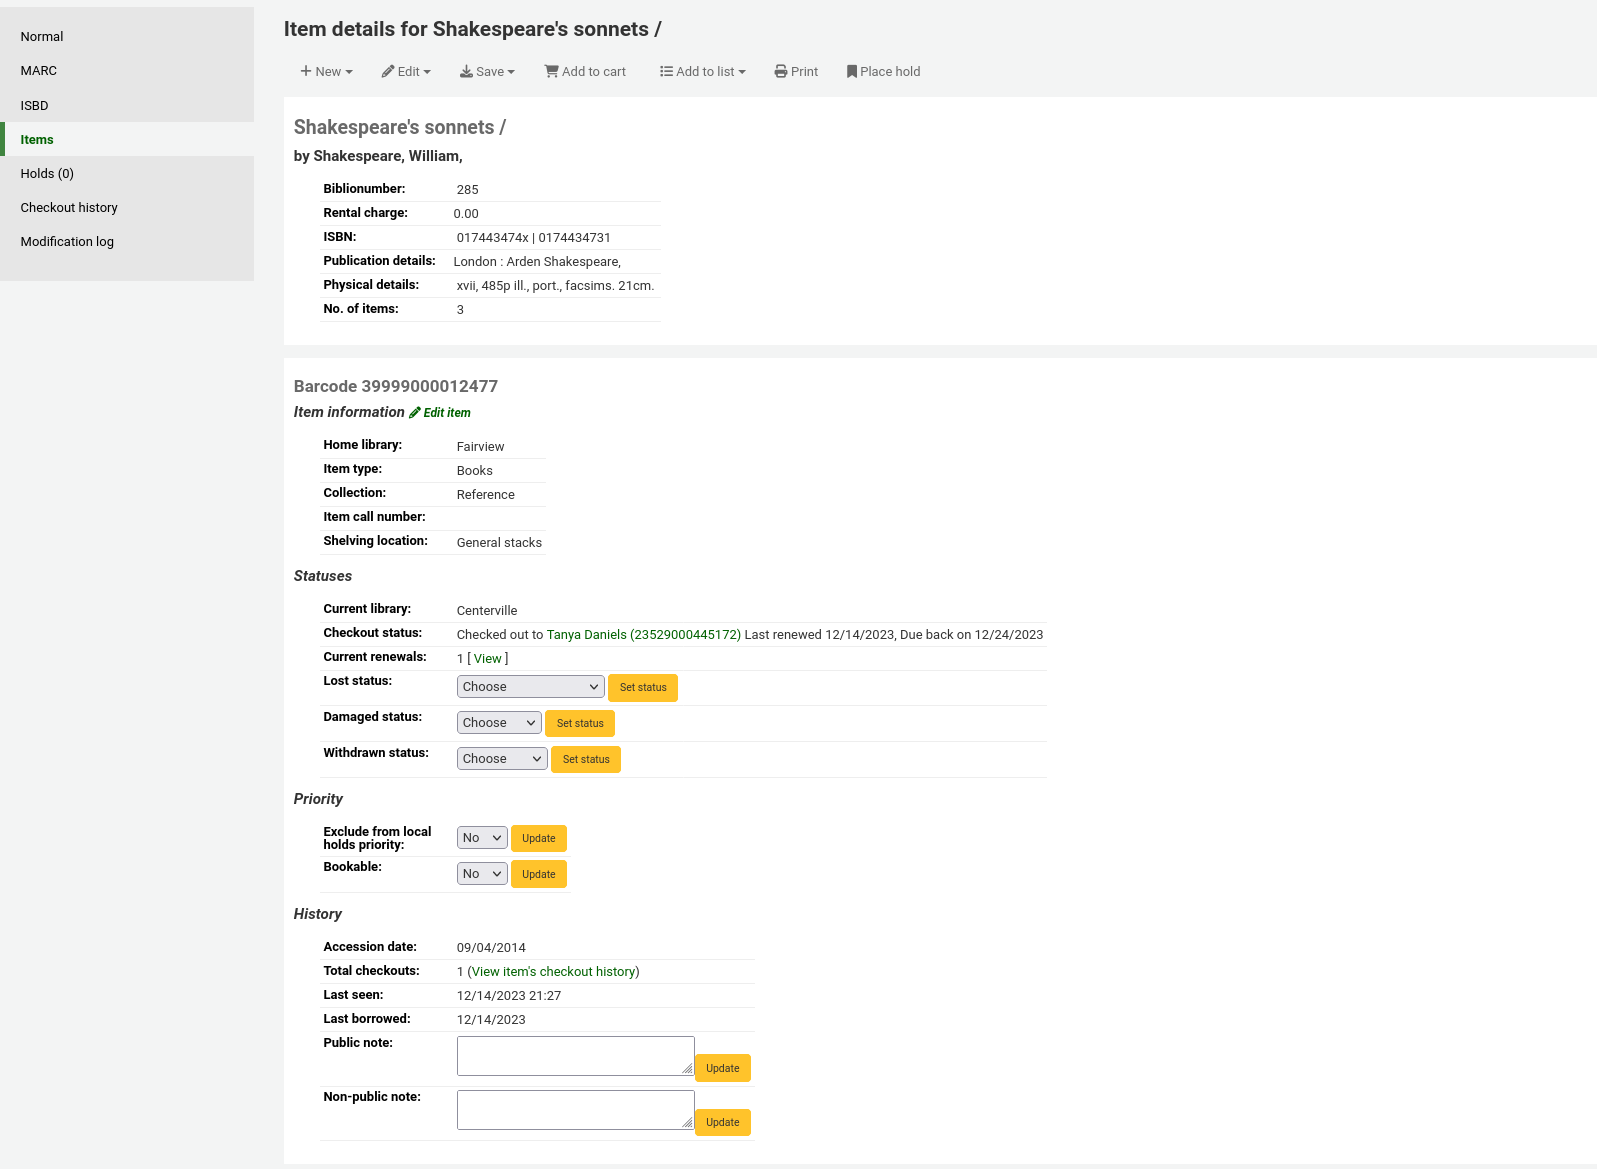
Quick item status updatesCirculation staff often need to change the status of an item to Lost or Damaged. This doesn’t require you to edit the entire item record. Instead, clicking on the item barcode on the checkout summary or checkin history will bring you to an item summary. You can also get to the item summary by clicking on the Items tab to the left of the bibliographic record’s detail page.
From this view, you can mark an item lost by choosing a lost status from the pull down and clicking the ‘Set status’ button. Same applies to the damaged and withdrawn statuses.

You can easily duplicate each item by clicking the ‘Actions’ button the left of each item on the edit items screen
From here you can choose to ‘Duplicate’ the item and this will populate the form with the values from the item you chose.
Batch editing itemsNote
Only staff with the items_batchmod permission (or the superlibrarian permission) will have access to this tool.
Get there: More > Cataloging > Batch editing > Batch item modification
This tool will allow you to modify a batch of item records in Koha.

From the tool, choose to either upload a file of barcodes or itemnumbers, or scan item barcodes one by one into the box below the upload tool. You can also decide the items edited should be populated with the default values defined in the default framework.
Once the file is uploaded or the barcodes listed, click ‘Continue.’

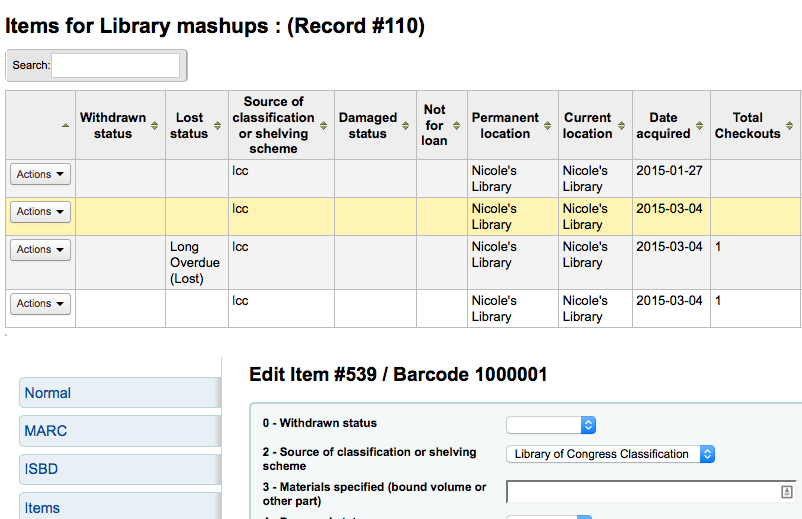
You will be presented with a summary of the items you want to modify. From here, you can uncheck the items you don’t want to modify before making changes in the form below. You can also hide columns you don’t need to see to prevent having to scroll from left to right to see the entire item table. The holds column displays a count of the current holds for the item.
Note
To uncheck all items that are currently checked out you can click the ‘Clear on loan’ link at the top of the form.
Using the edit form, choose which fields to make edits to. By checking the checkbox to the right of each field you can clear the values in that field for the items you are modifying.

You can also click the ‘RegEx’ link to change the text field to a regular expression substitution. This is used to change only a part of a text string.

Once the changes are made, the job will be enqueued in the background jobs.

To see the edited items, click on ‘View detail of the enqueued job’.

You can also edit items on one bibliographic record in a batch by going to the bibliographic record and clicking Edit > Edit items in batch
This will bring you to the same batch item modification tool as above.
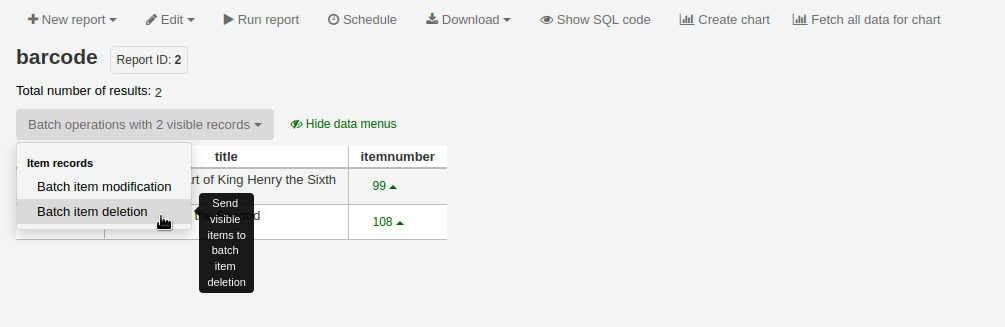
Batch editing items from a reportThe batch item modification tool is also available from reports results when the results contain itemnumbers.

When the report contains the itemnumber, the option ‘Batch operations with X visible records’ will automatically appear. This option contains batch item modification and batch item deletion.
By default, only 20 results are shown when running reports, therefore, the batch modification will only be done on 20 results. If you have more results that you want to edit in a batch, make sure to change the number of results per page before choosing the batch operation.
Batch editing items from the item searchVersion
This option was added to Koha in version 23.11.
The batch item modification tool is also available from the item search results.
Simply select items to be edited from the results list, click ‘Batch operations’, and choose ‘Batch item modification’.

You can group items in order to place holds on a subset of items on a bibliographic record, rather than a specific item or the next available item. For example, if you have a bibliographic record for a series, and several items of each volume, you can group items by volumes and then place holds on the next available item of “Vol. 4”.
Note
Staff members must have the manage_item_groups permission (or the superlibrarian permission) in order to create, edit, and delete item groups.
You need to first enable the item groups feature with the EnableItemGroups system preference.
Once the system preference is enabled, a new ‘Item groups’ tab will appear in the detailed record in the staff interface.

Click on the ‘New item group’ button
In the form that appears,
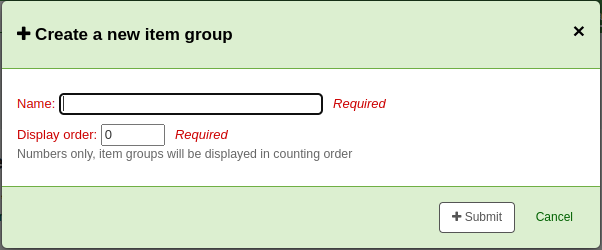
Name: enter a name for the group, this name will visible in the staff interface and the OPAC
Display order: enter a number for the position this group should be displayed compared to the other groups of the same record (for example, if you have groups with 0, 1 and 2 as display order, the 0 group will be displayed first, the 1 group will be displayed second and the 2 group will be displayed third. You can put any number in there, your groups can be 3, 11 and 27, in that case, 3 will be displayed first, then 11 and finally 27)
Click ‘Submit’ to create the group
Once it is created, you can add items to the group.
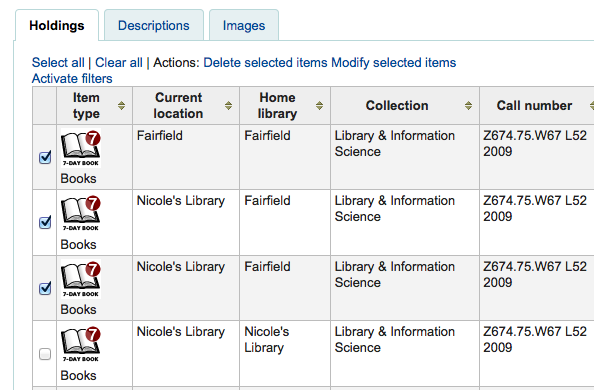
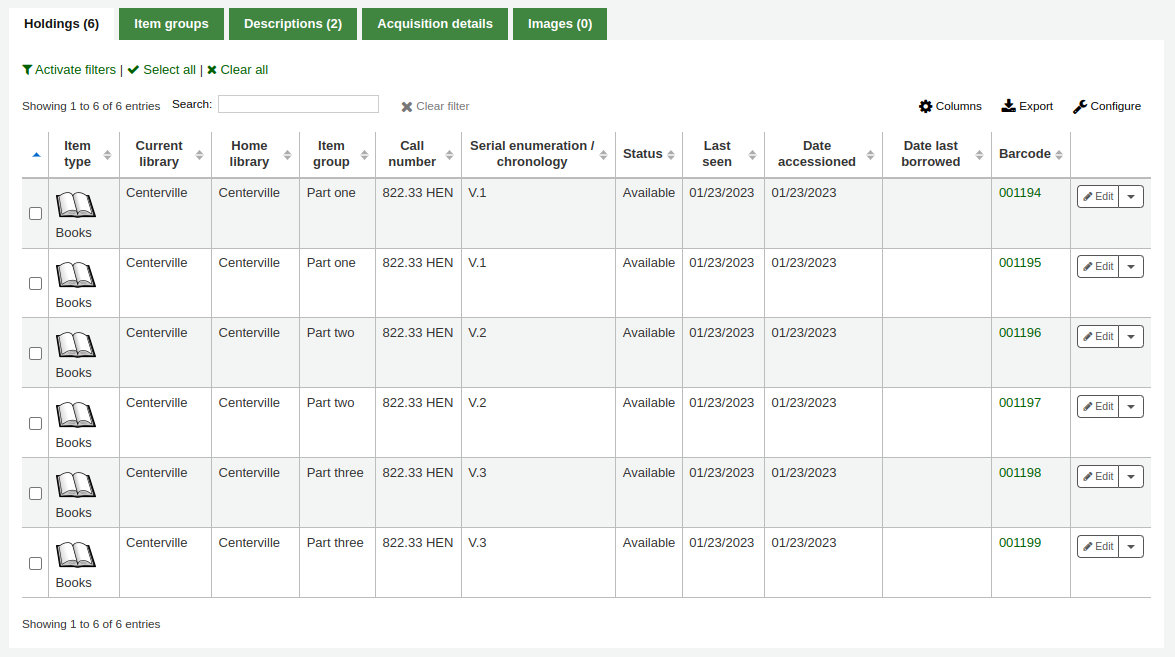
In the ‘Holdings’ tab, check the items that should be added to the group
At the top of the table, there will be batch actions, click on ‘Add/move to item group’
Choose which group the selected items should be added to

Click ‘Set item group’
The item group in which each item is will be shown in the ‘Holding’ table.
To delete an item group, go to the ‘Item groups’ tab, and click the ‘Delete’ button. This will only delete the group, the items will remain, but ungrouped.
Item informationTo the left of every bibliographic record there is a tab to view the items.
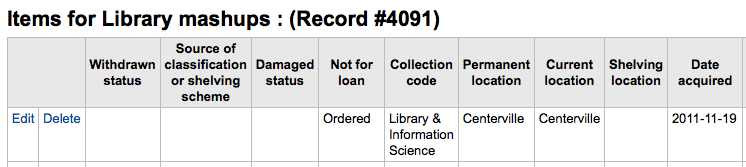
Clicking that tab will give you basic information about the items.
The ‘Item information’ section shows basic information about the item such as the home library, item type, collection, call number, copy number, shelving location, replacement price, and accompanying materials.

The ‘Statuses’ section shows the current status of the item. If the item is on loan, the loan details are displayed. If the item was renewed, you can click ‘View’ to see the details of any renewals, which include the date, the staff member who renewed the checkout, as well as if it was done manually or automatically (through the automatic_renewals.pl cronjob).
You can also view and edit the status information in this section. If an item is marked lost, damaged or withdrawn, you will see the date that status was applied.

The ‘Priority’ section shows if the item is excluded from local holds priority.

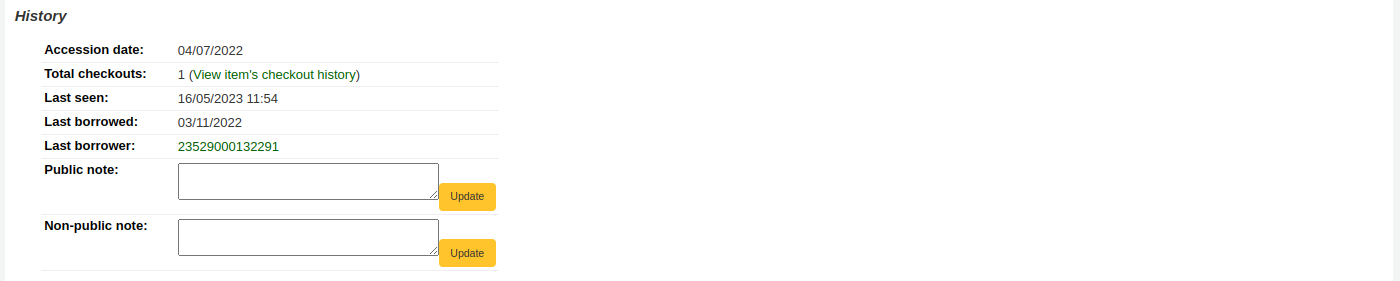
The ‘History’ section shows information about the acquisition and check out history of the item. If you ordered the item through the acquisitions module, this section will include the order date, vendor, accession (receiving) date and invoice number. Clicking the order or accession date will bring you to the acquisitions information for that item. This section also shows the number of total checkouts (with a link to see the checkout history), the date and time the item was last seen, the date it was last borrowed and the last patron to borrow this item (if the StoreLastBorrower system preference is enabled), if the item was paid for by the patron, the volume or serial number information, and public and non-public notes.
Note
Only staff with the upload_local_cover/koha_manual/cataloguing/assets) permission as well as the edit_items permission (or the superlibrarian permission) will be able to add cover images to items.
If you have either OPACLocalCoverImages or LocalCoverImages set to ‘Show’, you can upload cover images for individual item records from the ‘Upload image’ option from the Edit button on the right of the Holdings table.
Click Choose file to find the image file on your computer and then Upload file.
On the next screen you are given the option to replace existing images. You can then click on Process images.
The image will display in a Cover image column in the holdings display.
To delete an image, click on the image in the holdings display. You will see a greyed out copy of the image with the option to delete.

Note
Staff members must have the edit_items permission (or the superlibrarian permission) in order to be able to move items.
Items can be moved from one bibliographic record to another using the ‘Attach item’ option.

Visit the bibliographic record you want to attach the item to and choose ‘Attach item’ from the ‘Edit’ menu.
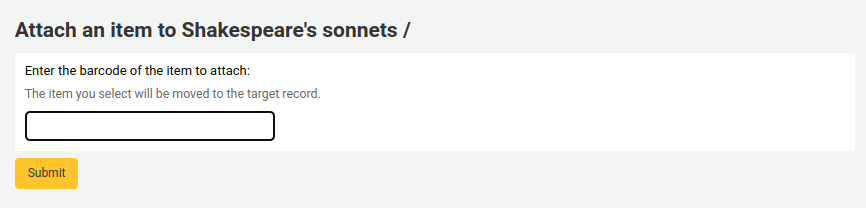
Simply enter the barcode for the item you want to move and click ‘Submit’.
If this is the last remaining item attached to a bibliographic record you will be presented with a button to delete the original host record.

If you want to move all items to a new record creating only one bibliographic record you can use the merge records tool instead.
Deleting itemsNote
Staff members must have the edit_items permission (or the superlibrarian permission) in order to be able to delete items.
There are many ways to delete item records. If you only need to delete one item you can do this by opening up the detail page for the bib record and clicking the ‘Edit’ button at the top. From there you can choose to ‘Edit items’.

You will be presented with a list of items and next to each one will be a link labeled ‘Delete’. Click that link and if the item is not checked out it will delete that item.
If you know that all of the items attached to your record are not currently checked out you can use the ‘Delete all items’ option under the ‘Edit menu’ and it will remove all items from the record.
Note
Staff members must have the delete_all_items permission (or the superlibrarian permission) in order to be able to delete all of a record’s items.
You can also enable StaffDetailItemSelection to have checkboxes appear to the left of each item on the detail display. You can then check off the items you would like to delete and click ‘Delete selected items’ at the top of the list.
Finally you can use the batch delete tool to delete a batch of items.
Batch deleting itemsNote
Only staff with the items_batchdel permission (or the superlibrarian permission) will have access to this tool.
Get there: More > Cataloging > Batch editing > Batch item deletion
This tool will allow you to delete a batch of item records from Koha.
From the tool, choose to either upload a file of barcodes or itemnumbers, or scan item barcodes one by one into the box below the upload tool.

Once the file is uploaded or the barcodes listed, click ‘Continue.’
You will be presented with a confirmation screen. From here you can uncheck the items you don’t want to delete. You can check the ‘Delete records if no items remain’ box to delete the bibliographic record if the last item is being deleted.

Note
Items that are the last item attached to a bibliographic record with one or more record-level holds will be automatically unchecked. You will need to delete the hold before deleting the item.
Items that are checked out will also be automatically unchecked. They will need to be checked in before they can be deleted.
If your file (or list of scanned barcodes) has more than 1000 barcodes, Koha will be unable to present you with a list of the items. You will still be able to delete them, but not able to choose which items specifically to delete or delete the bibliographic records.

Click ‘Delete selected items.’
Note
If the items are checked out the items will not be deleted.
The deletion job will be enqueued in the background jobs.

To see the deletion details, click ‘View detail of the enqueued job’.

To delete a new batch of items, click ‘New batch item deletion’.
Batch deleting items from the bibliographic recordThe batch item deletion tool is also available from the bibliographic record details page.
From the bibliographic record details page, click the ‘Edit’ button and choose the ‘Delete items in a batch’ option.

This will open the batch item deletion tool for the items of the specific record.
Batch deleting items from a reportThe batch item deletion tool is also available from reports results when the results contain itemnumbers.
When the report contains the itemnumber, the option ‘Batch operations with X visible records’ will automatically appear. This option contains batch item modification and batch item deletion.
By default, only 20 results are shown when running reports, therefore, the batch deletion will only be done on 20 results. If you have more results that you want to delete in a batch, make sure to change the number of results per page before choosing the batch operation.
Batch deleting items from the item searchVersion
This option was added to Koha in version 23.11.
The batch item deletion tool is also available from the item search results.
Simply select items to be deleted from the results list, click ‘Batch operations’, and choose ‘Batch item deletion’.
Each bibliographic record keeps a circulation history (with or without the patron information depending on your settings), but each item also has its own circulation history page. To see this, click on the ‘Items’ tab to the left of the record you are viewing.
Below the ‘History’ heading is a link to ‘View item’s checkout history,’ clicking that will open up the item’s history which will look slightly different from the bibliographic record’s history page.

Get there: More > Cataloging > Automation > Automatic item modifications by age
This tool allows you to update item specific fields when an item reaches a certain age.
Note
Only staff with the items_batchmod permission (or the superlibrarian permission) will have access to this tool.
Note
The settings in this tool will be acted upon by the corresponding cron job.
If you haven’t created any rules, you will see the option to ‘Add rules’ on the page. Click this button to create rules.

If you have rules already there will be a button that reads ‘Edit rules’. To create a new rule click the ‘Edit rules’ button at the top of the page.

You will be brought to a page where you can edit existing rules or create a new rule.

Click ‘Add rule’.
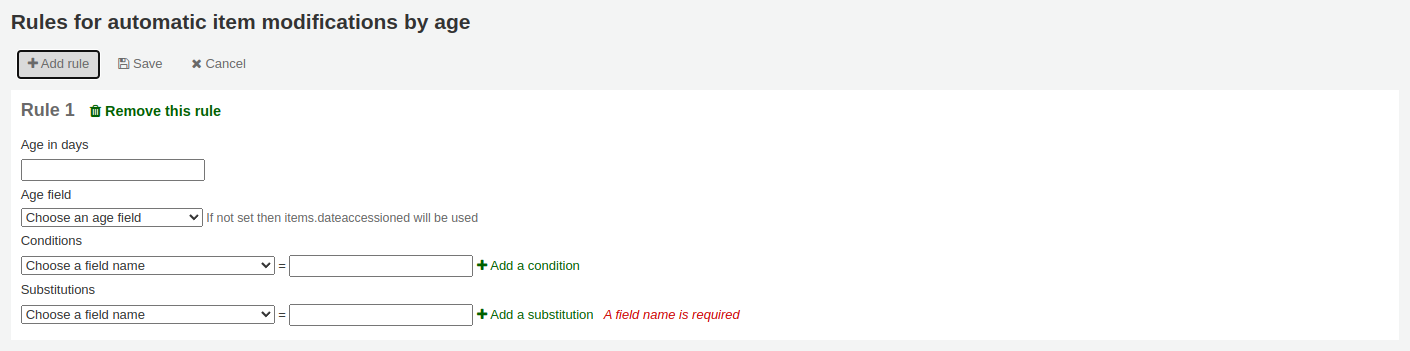
Fill out the form that appears to set the new rule:
Age in days: the age in days at which the item will update
Age field: the field on which the age is based
items.dateaccessioned (default): date of acquisition of the item; in MARC21, it is normally mapped to 952$d
items.replacementpricedate: date the replacement price is effective from; in MARC21, it is normally mapped to 952$w
items.datelastborrowed: date the item was last checked out; in MARC21, it is normally mapped to 952$s (not editable manually)
items.datelastseen: date of the last transaction made on the item; in MARC21, it is normally mapped to 952$r (not editable manually)
items.damaged_on: date on which the damaged status was set (not editable manually)
items.lost_on: date on which the lost status was set (not editable manually)
items.withdrawn_on: date on which the withdrawn status was set (not editable manually)
Conditions: what criteria is needed to trigger the update
Choose the field to check from the dropdown menu
Enter the value the field should have to trigger the update
If you need more than one condition, click ‘Add a condition’
Substitutions: what changes are made when the script runs
Choose the field to change from the dropdown menu
Enter the value the field should have after the update
If you need to do more than one change, click ‘Add a substitution’
Once you’re done, click the ‘Save’ button to save the rule and go back to the main page, or click ‘Add rule’ again to add another rule.
Get there: More > Cataloging > Automation > Stock rotation
Note
This tool will only be available if the StockRotation system preference is enabled.
Note
Only staff with the stockrotation permission or subpermissions (or the superlibrarian permission) will have access to this tool.
Stock rotation helps to spread resources more fairly among library branches and allows patrons to see a wider range of titles.
Items are popular while they are new at a particular branch. However, their use often tails off over time. This tool empowers librarians to automate the movement of items on to another branch before usage declines and thereby extend the items’ useful life.
Library staff create rotation plans (rotas) and then assign items to them. A cronjob is then used to cycle these items round the specified libraries on the rotation plan, moving them to the next stage after the prescribed period of time has passed at the current stage.
Note
For this tool to work as intended, the stockrotation.pl cron job needs to be configured to run on a daily basis.
Email notices may be used to provide the libraries with a list of items on the shelf to be put in transit to the next library. If an item is on loan at the time it should be transferred, an alert will be displayed when it is next returned.
Note
The notice used is SR_SLIP. It can be customized with the Notices and slips tool.
From the stock rotation page you can add new rotation plans (rotas) and see a summary of your currently configured rotas. For each existing rota, there are buttons to: edit, manage stages and items, activate or deactivate, delete.

Note
You can customize the columns of this table in the ‘Table settings’ section of the Administration module (table id: stock_rotation).
Note
Only staff with the manage_rotas permission (or the superlibrarian permission) will be able to create new rotas.
To create a new rota (rotation plan), click the ‘New rota’ button on the main stock rotation page.

Name: enter a name or code to identify the rota
Cyclical:
No: items will remain at the last library on the rotation plan upon reaching the end of the rota
Yes: items will continue to rotate, returning back to the first library on the rotation plan once they have completed their allotted time at the last library, indefinitely until manually removed from the rota
Description: optionally add an expanded description of the rota for display in summary views
Once the rota is complete with stages and items, activate it to begin cycling the items through the rotation: on the stock rotation summary, click the ‘Activate’ button next to the rota.
Note
Only staff with the manage_rotas permission (or the superlibrarian permission) will be able to add stages to rotas.
Once the rota is created, you can add stages to it. Stages are a length of time that an item will stay at a particular library before moving on.
From the stock rotation summary page, click the ‘Manage’ button and choose the ‘Stages’ option.

Click the ‘Add stage’ button.

Library: choose the library this stage is for
Duration: enter the number of days the item should stay at this library before moving on
Click ‘Save’.

Once all the stages have been added, you can move them around using the handles on the left to change the order.
Adding items to a rotaNote
Only staff with the manage_rota_items permission (or the superlibrarian permission) will be able to add items to existing rotas.
Once a rota has stages, items can be added to it.
From the stock rotation summary page, click the ‘Manage’ button and choose the ‘Items’ option.

Click the ‘Add items’ button.
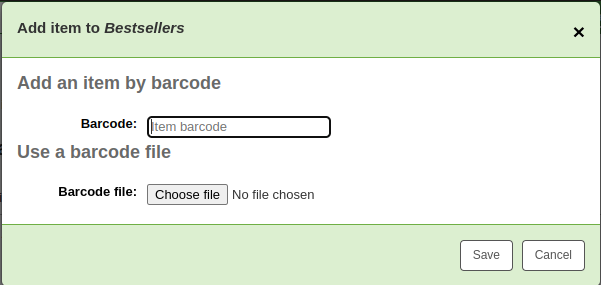
Items can be added to a rota individually (by barcode) or in bulk (via the upload of a line delimited barcode file).
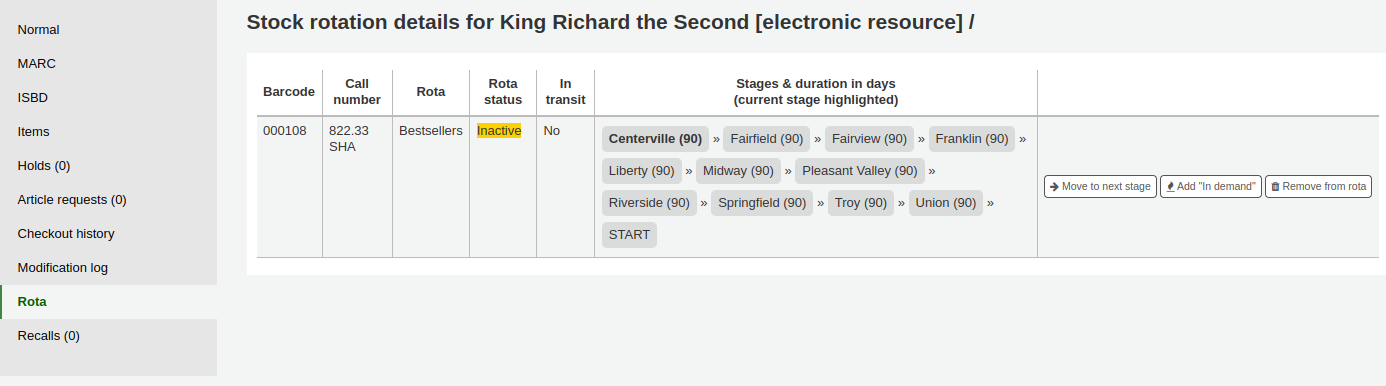
Items can also be added to a rota through the staff interface catalog, in the ‘Rota’ tab on the left when viewing a detailed record.

Choose the rota to add the item to and click ‘Add to rota’.
Items can also be automatically added to rotas at acquisition time by using the LRP (Library Rotation Plan) field in EDI.
On the Manage > Items page, there will be a summary of all items on the rota with their current location. You have options to immediately progress items, mark items as ‘in demand’ and remove an item from rotation.

Note
You can customize the columns of this table in the ‘Table settings’ section of the Administration module (table id: stock_rotation_manage_items).
Move to next stage: progress the item directly to the next stage even if the duration at the current stage is not complete.
Add “In demand”: double the duration the item will stay at it’s current stage compared to what is set in the rota. This is often used for items that are found to be unexpectedly popular at a particular library.
Remove from rota: remove the item from the rota.
Individual items can also be managed from the staff interface catalog, in the ‘Rota’ tab.
Note
Only staff with the label_creator permission (or the superlibrarian permission) will have access to this tool.
Get there: More > Cataloging > Tools > Label creator
The label creator tool allows you to use layouts and templates which you design to print a nearly unlimited variety of labels including barcodes. Here are some of the features of the label creator tool:
Customize label layouts
Design custom label templates for printed labels
Build and manage batches of labels
Export single or multiple batches
Export single or multiple labels from within a batch
Export label data in one of three formats:
PDF - Readable by any standard PDF reader, making labels printable directly on a printer
CSV - Export label data after your chosen layout is applied allowing labels to be imported in to a variety of applications
XML - Included as an alternate export format
Label layoutsGet there: More > Cataloging > Tools > Label creator > Manage > Layouts
A layout is used to define the fields you want to appear on your labels.
Adding a layoutTo add a new layout, click on the ‘New’ button at the top of the label creator tool and choose ‘Layout’.

Using the form that appears, decide what appears on your labels.

‘Layout name’: enter a name for the layout to help you identify it later.
‘Choose barcode type (encoding)’: if this is a barcode label, choose the encoding (Code 39 is the most common)
‘Choose layout type’: choose what type of information is printed on the label.
Only the bibliographic data is printed: only bibliographic information will appear on the label (this can be used for spine labels for example)

Note
Bibliographic data includes any of the data fields that may be mapped to your MARC frameworks.
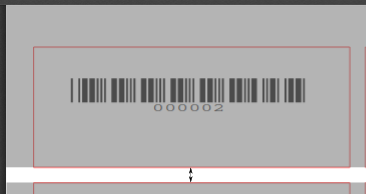
Barcode precedes bibliographic data: the barcode will appear at the top of the label and the bibliographic information underneath

Bibliographic data precedes barcode: the bibliographic information will appear at the top of the label and the barcode underneath

Barcode and bibliographic data are printed on alternating labels: the bibliographic information will appear on one label, and the barcode on the next label, alternating for each item

Only the barcode is printed: only the barcode will appear on the label
‘Bibliographic data to print’: if you chose to print bibliographic data on the label, choose from the preset list of fields which fields should appear on the label and in which order. Alternatively, you can click on ‘List fields’ and enter your own data.

Note
In ‘List fields’, you can specify any database field from the following tables (use the schema viewer (http://schema.koha-community.org) to find the field names):
items
biblioitems
biblio
branches
You can also specify MARC subfields as a 4-character tag-subfield string, for example 254a for the title field in MARC21.
You can also enclose a whitespace-separated list of fields to concatenate on one line in double quotes, for example “099a 099b” or “itemcallnumber barcode”.
Finally you can add in static text strings in single-quote, for example ‘Some static text here.’
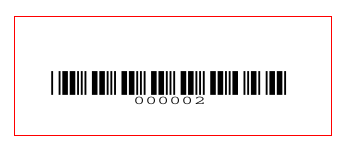
‘Draw guide boxes’: choose if guidelines are printed around each label (this is useful when first setting up the label creator to check alignment with your label sheets)
‘Split call numbers’: choose if call numbers should be split (usually used on spine labels)
Note
Call number splitting rules are managed under Administration > Classification sources.
‘Text justification’: choose the text alignment (left, center or right)
‘Font’: choose the font type
Font type choices are currently limited to:
Times-Roman (regular, bold, italic, or bold-italic): a serif font type
Courier (regular, bold, oblique (italic), or bold-oblique (bold-italic)): a monospace font type
Helvetica (regular, bold, oblique (italic), or bold-oblique (bold-italic)): a sans-serif font type
‘Font size’: enter the font size in points
‘Barcode width’: when printing barcodes, enter the width of the barcode as a fraction of the label width itself. For example, 0.8 means the barcode will take up 80% of the label length-wise.
‘Barcode height’: when printing barcodes, enter the height of the barcode asa fraction of the label height.
‘Oblique title’: choose if the title should be italicized
Click ‘Save’ to save the new layout.
After saving, your layouts will appear under Manage > Layouts.
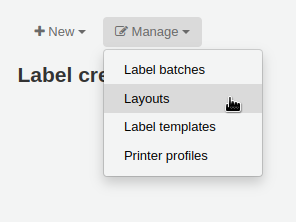
To edit an existing layout, click on the ‘Manage’ button at the top of the label creator tool and choose ‘Layout’.
In the table of currently available layouts, click the ‘Edit’ button next to the layout you want to edit.

Change the necessary values and click ‘Save’.
Deleting a layoutTo delete an existing layout, click on the ‘Manage’ button at the top of the label creator tool and choose ‘Layout’.
In the table of currently available layouts, click the ‘Delete’ button next to the layout you want to delete, and confirm the deletion.
Get there: More > Cataloging > Tools > Label creator > Manage > Label templates
A template is based on the label/card stock you are using. This might be Avery 5160 for address labels, Gaylord 47-284 for spine labels or Avery 28371 for your patron cards, just to give a couple of examples. These labels will include all of the information you will need for setting up in Koha. This information may be on the packaging, on the vendor’s website or it can be measured manually.
Adding a templateTo add a new template, click on the ‘New’ button at the top of the label creator page and choose ‘Label template’.

Using the form that appears you can define the template for your sheet of labels or cards.

‘Template ID’: this will be automatically generated after saving your template, this is simply a system-generated unique id
‘Template code’: enter a code for the template, the code should be something you can use to identify your template on a list of templates
‘Template description’: use this field to add additional information about the template
‘Units’: choose which measurement scale you’re going to be using for the template. This should probably match the unit of measurement used on the template description provided by the product vendor.

The measurements, number of columns and number of rows can be found on the packaging, on the vendor’s website or they can be measured manually.
Page height: height of the page
Page width: width of the page
Label width: width of the label

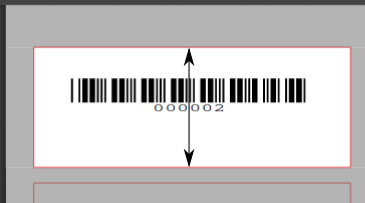
Label height: height of the label
Top page margin: height between the top of the page and the top of the first row of labels

Left page margin: width between the left side of the page and the left side of the first column of labels

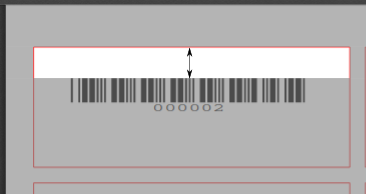
Top text margin: height between the top of the label and the top of the first line of text
Left text margin: width between the left side of the label and the start of the text

Note
If you do not supply a left text margin in the template, a 3/16” (13.5 point) left text margin will apply by default.
Number of columns: number of columns of labels in a page, or number of labels per row
Number of rows: number of rows of labels in a page, or number of labels per column
Gap between columns: width between two columns of labels

Gap between rows: height between two rows of labels
A profile is a set of “adjustments” applied to a given template just prior to printing which compensates for anomalies unique and peculiar to a given printer (to which the profile is assigned).
Before picking a profile try printing some sample labels so that you can easily define a profile that is right for your printer/template combination.
After finding any anomalies in the printed document, create a profile and assign it to the template.
Click ‘Save’ to save the new template.
After saving, your templates will appear under Manage > Label templates.

To edit an existing template, click on the ‘Manage’ button at the top of the label creator page and choose ‘Label template’.
In the table of currently available templates, click the ‘Edit’ button next to the template you want to edit.

Change the necessary values and click ‘Save’.
Deleting a templateTo delete an existing template, click on the ‘Manage’ button at the top of the label creator page and choose ‘Label template’.
In the table of currently available layouts, click the ‘Delete’ button next to the layout you want to delete, and confirm the deletion.
Printer profiles
A profile is a set of “adjustments” applied to a given template just prior to printing which compensates for anomalies unique and peculiar to a given printer (to which the profile is assigned). This means if you set a template up and then print a sample set of data and find that the items are not all aligned the same on each label, you need to set up a profile for each printer to make up for the differences in printing styles, such as the shifting of text to the left, right, top or bottom.
If your labels are printing just the way you want, you will not need a profile.
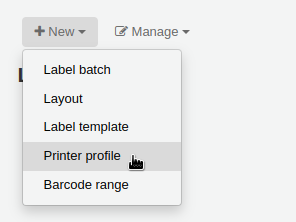
Adding a printer profileTo add a new profile, click on the ‘New’ button at the top of the label creator tool and choose ‘Printer profile’.
Using the form that appears you can create a profile to fix any problems with your template.

‘Printer name’: enter a name for the printer. It does not have to match your printer exactly, it is only used for reference within Koha, so you can use the printer model number or you can call it ‘the printer on my desk’.
‘Paper bin’: enter a name for the printer’s paper tray. Like the printer name, it is only used as a reference.
‘Template name’ will be filled in once you have chosen which template to apply the profile to in the template edit form
‘Units’: define what measurement scale you’re using for your profile.
The next sections are used to adjust the label printing.
Offset describes what happens when the entire image is off center either vertically or horizontally
Creep describes a condition where the distance between the labels changes across the page or up and down the page
Note
For these values, negative numbers move the error up and to the left and positive numbers move the error down and to the right
Example: the text is .25” from the left edge of the first label, .28” from the left edge of the second label and .31” from the left edge of the third label. This means the horizontal creep should be set to .03” to make up for this difference.
Click ‘Save’ to save the new profile.
After saving, your profiles will appear under Manage > Printer profiles.

Once you have saved your new profile, you can return to the list of templates and edit the template that this profile is for.
Editing a printer profileTo edit an existing printer profile, click on the ‘Manage’ button at the top of the label creator page and choose ‘Printer profiles’.
In the table of currently available printer profiles, click the ‘Edit’ button next to the profile you want to edit.

Change the necessary values and click ‘Save’.
Deleting a printer profileTo delete an existing printer profile, click on the ‘Manage’ button at the top of the label creator page and choose ‘Printer profiles’.
In the table of currently available profiles, click the ‘Delete’ button next to the profile you want to delete, and confirm the deletion.
Get there: More > Cataloging > Tools > Label creator > Manage > Label batches
Batches are made up of the items for which you would like to print labels. Once in this tool you can search for the item records you would like to print out labels for.
Adding a label batchBatches can be created in one of two ways. The first is to click the ‘Create label batch’ link on the Staged MARC management page.

The other is to choose to create a new batch from the label creator tool

You will be brought to an empty batch with a box to scan barcodes or itemnumbers in to and an ‘Add item(s)’ button at the bottom of the page.

You can either scan barcodes in to the box provided and click the ‘Add item(s)’ button or you can click the ‘Add item(s)’ button with the barcodes box empty. Clicking ‘Add item(s)’ with nothing in the barcodes box will open a search window for you to find the items you want to add to the batch.

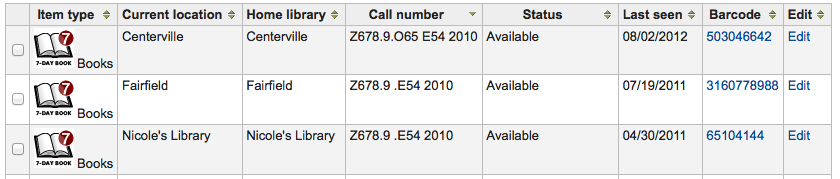
From the search results, click the check box next to the items you want to add to the batch and click the ‘Add checked’ button. You can also add items one by one by clicking the ‘Add’ link to the left of each item.

Once you have added all of the items click the ‘Done’ button. Click again on the ‘Add item(s)’ button to transfer the items from the barcode box to the batch. The resulting page will list the items you have selected.

If some items were added more than once by accident, you can click the ‘Remove duplicates’ button. This will check barcodes and remove any duplicates from the batch.
If you need to remove some items from the batch, select them by checking the box on the right and click the ‘Remove selected items’ button.
Optionally, you can add a description to this batch, in case you need to find it later. Enter a description in the ‘Batch description’ field and click ‘Save description’. This description will appear in the ‘Currently available batches’ page.
To print your labels, click the ‘Export full batch’ button. To print only some of the labels, select the items and click the ‘Export selected item(s)’ button. To print only one label from the batch, click the ‘Export’ button to the right of that item. Either way you will be presented with a confirmation screen where you can choose your template and layout. If you’re using a sheet of labels that is not complete, you can enter the starting label (labels are counted horizontally).

You will then be presented with three download options: PDF, CSV, or XML.

After saving your file, simply print on the blank labels you have in your library.
The batch is saved for later use, if needed, and is accessible under Manage > Label batches.

To edit an existing label batch, click on the ‘Manage’ button at the top of the label creator page and choose ‘Label batches’.
You will access currently available batches.

You can print one or more batches directly from this page by checking the box to the right of the batch or batches to print and clicking ‘Export selected’.
To edit a batch, click the ‘Edit’ button next to the batch you want to edit.
Deleting a label batchTo delete an existing label batch, click on the ‘Manage’ button at the top of the label creator page and choose ‘Label batches’.
You will access currently available batches.
Click the ‘Delete’ button next to the batch you want to delete, and confirm the deletion.
You can also delete a batch from the batch page itself, by clicking the ‘Delete batch’ button above the table of items in the batch.
Barcode rangeGet there: More > Cataloging > Tools > Label creator > New > Barcode range
If you want to print your barcode labels in advance, before even cataloging the items, you can choose to add a batch of a range of barcodes.
Click ‘New’ and choose ‘Barcode range’ from the label creator tool.

Enter the starting and ending barcodes.

Warning
The barcode range tool does not accept leading zeroes. If you enter 0001234 the barcode that will be printed will be 1234.
Click ‘Print range’.
You will be presented with the confirmation screen where you can choose your template and layout and enter the starting label if using an incomplete sheet of labels.
Note
The only download option for barcode ranges is PDF.
Save the file and print it on a blank sheet of labels.
Barcode generatorNote
Only staff with the label_creator permission (or the superlibrarian permission) will have access to this tool.
Get there: More > Cataloging > Tools > Barcode generator
Koha offers a barcode generator tool that can be used to create images of barcodes for various uses (in notices for example).
This tool can be used for a number of types of barcodes, as well as QR codes.
It will create an image from the given barcode in the chosen barcode format and also generate a unique HTML tag which can be used anywhere.

To generate a new image, fill out the form.
Barcode type: choose the barcode type to be used
Note
Most barcode types allow only numerical characters.
The following allow alphanumeric characters:
Code39
NW7
QRcode
Some barcode types (EAN13, EAN8, UPCA, and UPCE) expect specific patterns (which can be found here https://barcode.tec-it.com/en/ under EAN/UPC).
Hide text: check this box if you only want the actual barcode on the image. If unchecked, the number will be printed in human readable characters under the barcode.
Barcode height: enter the height in pixels the barcode image should have
Barcode: enter the barcode to be printed
Click ‘Show barcode’.

On the right of the screen is the barcode image, which can be downloaded or printed.
Under the image, there is an HTML ‘img’ tag. You can copy the tag and paste it anywhere you need the barcode to appear (however, note that it is only available in the staff interface).
For a QR Code, the options are slightly different. Instead of ‘Barcode height’, there is a ‘QR Code module size’ field that can be adjusted by slider. The number refers to the size in pixels of each black or white square in the code (modules). The larger the modules, the larger the image will be.
A QR Code can take not only alphanumeric characters, but any type of textual information, such as a URL or even a short text.

Note
Only staff with the label_creator permission (or the superlibrarian permission) will have access to this tool.
Get there: More > Cataloging > Tools > Quick spine label creator
Note
This tool does not use the label layouts or templates, it simply prints a spine label in the first spot on the label sheet, or on a single label from a label printer.
Define the fields you want to print on the spine label in the SpineLabelFormat system preference.
Format your label printing by either editing the spinelabel.css file found in koha-tmpl/intranet-tmpl/prog/en/css/ or adding the CSS directly in the IntranetUserCSS system preference.
For example, adding the following CSS code in IntranetUserCSS will alter the label’s font.

To use this tool you simply need the barcode for the book you’d like to print the spine label for, and click ‘View spine label’.
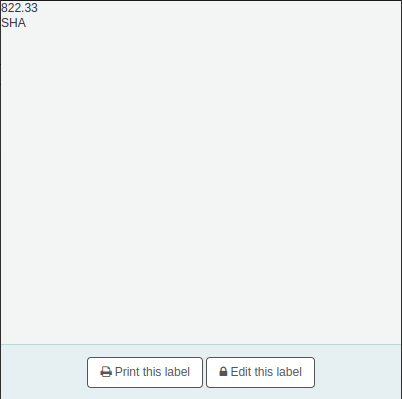
From the page that appears, click ‘Print this label’.
If for some reason you need to change the callnumber, click ‘Edit this label’. The lock icon on the button will become unlocked, and you will be able to click on the callnumber to edit it.
